Kamis, 13 September 2012

OpenSUSE Tutorials

OpenSUSE Tutorials
The Novell sponsored OpenSUSE distribution is developed by the community driven OpenSUSE Project and holds a secure spot as one of the most popular distributions available. OpenSUSE focuses on bringing users a well-rounded desktop full of graphical enhancements and innovative OpenSUSE tools. YaST control center, ZYpp package management, the OpenSUSE Build Service, Xgl and Compiz are just a few of the impressive tools available in OpenSUSE

 LESSON # 1


Automate Install With AutoYaST Answer Files

 
  1. Building a reference file
  2. Editing the file
    a. Disk Partitioning
    b. Boot Loader
    c. User
    d. Networking
  3. Running the install with AutoYaST

Building a Reference File

During the installation of openSUSE you can clone your installation to make an answer file. If that was not chosen though, it is still easy to create after the install though YaST after the event. I would suggest though, whichever way the answer file is created it will still want some tuning with a text editor afterwards. With openSUSE the autoyast editor is not installed by default, so we need to add this with:
zypper in autoyast2
OpenSUSE Install With AutoYaST
Once this is successfully installed you will be able to access this in YaST, the main SUSE control panel, in the Miscellaneous Section > Autoinstallation
OpenSUSE Install With AutoYaST
Selecting the program icon then will take you into the answer file editor. From the tools menu, found at the top, we can then select: “Create Reference Profile”. This allows an answer file to be created from the current, or host machine settings. We can choose which settings we want to copy and then select ok.
OpenSUSE Install With AutoYaST
The editor is OK and we can choose some configurations that we want to copy, like the boot loaded, date and time, keyboard, package selection etc. Some of these settings will need editing after and with others, it is simply easiest to add the configuration to the XML file directly.
With the file created choose save as from the menu and in my case, for the demonstration, I will save to /install/11-4/oss.xml. This location is accessible as my web installation source.

Editing to answer file

To edit the file directly you can use any text editor, I will use VI but it is personal choice. The YaST editor is ok but, as with so many GUI tools, it simply cannot set everything exactly the way you want or need. Many of the setting relate to specific resources like the disk-id of the host machine or the MAC Address of the host. If we were to clone the users and groups, all users and groups are cloned, even the system accounts. This is not required as the accounts are created as services are installed. I would see the YaST tool as a starting point from then on edits can be made with the text editor.

Disk Partitioning

Unless we need a specific partitioning scheme we can allow autoyast to build the partition table for us and format the volumes. This will provide for a swap partition and a root partition. For simple desktops and servers this is enough and keeps the configuration really simple:
OpenSUSE Install With AutoYaST
Being an XM file we start with <partitioning> and close with </partitioning>. We then add a <drive>. We do not mention the device name so the first drive found is used, the partition table is wiped and <use>all</use> denotes the auto-partitioning.

Bootloader

This is easy to clone but we need to make sure that we delete any reference to disks by their ID and replace with device names.
OpenSUSE Install With AutoYaST
From the partial <bootloader> XML section we can see the grub stanzas point to disk/by-id entries. This, then, is pointing to unique identifiers on the cloned machine. We need to change these to device names, such as, for the resume (swap) entry /dev/sda1 and the root entry /dev/sda2:
OpenSUSE Install With AutoYaST
Check the whole of the bootloader section for these types of entries. I have also removed the stanzas for the failsafe mode and floppy boot as they are not required.

Users

It is easy to add your own user section. If you use the YaST tool, it will clone all users and groups. We only need to create the root user and perhaps one other standard user. All other system users and groups are created as required.
OpenSUSE Install With AutoYaST
Each user will appear in the <users> XML section delineated but <user></user>. Here , the user root has been added with a clear text password. For added security, use the output of the normal passwd command to generate an encrypted password. The encrypted flag would then be set to true.

Networking

Take great care and caution when cloning the networking settings, it is easy to have misconfigurations with MAC Address being included which relate to the host machine. Once you have a Networking section created it become easy to copy, personally, I have become used to using my own Networking section.
OpenSUSE Install With AutoYaST

Installing using the answer file

Once created there may be a little debugging left. However, we need to test with a sample build to work out what is working and what is not. Building on to a virtual machine is just perfect as we can always revert to saved version of the VM to test again and again. It will not take long until you have the perfect answer file. If you are installing using the PXE boot setup we have created we then need to add the autoyast file entry into the /srv/tftpboot/pxelinux.cfg/default file.
OpenSUSE Install With AutoYaST
The addition being to the append line: autoyast=http://172.17.1.1/opensuse11-4/oss.xml
The install then should proceed unhindered and without input from yourself other than to select the install option from the PXE menu.

Create a Script to test Network Connection

 Thanks for visiting my blog and I hope what you learn here, will be for doing good or Justice to the World!


Create a Script called netck.sh .  The purpose of the script is to check network connectivity but in the process to learn how testing works as well.  Remember, when you execute a script and it is successful you will get a return of “0″ and if it is unsuccessful you will get any other number.
1. Create the script
#!/bin/bash
SITE="google.com"
ping -c 2 $SITE > /dev/null
if [ $? != 0 ]
then
echo $(date +%F)
echo Problems with the network!
fi

SITE=”google.com”
This variable is used for the site to test against.  You could build in the gateway, another server, etc. if you wanted to.
ping -c 2 $SITE > /dev/null
You will use ping and only ping the site 2 times, with the output being sent to /dev/null so it is not on screen.
if [ $? != 0 ]
This is a test that states that the success must be “0″, in other words the site must be up or it will send a message to the screen.
To test this change google.com to cnn.com(which does not accept pings) and you should see the error message.
then
echo $(date +%F)
echo Problems with the network!
fi
This reports the error message and the date if the ping is unsuccessful.
2. Test the script and then use other domains


Kamis, 06 September 2012

Development Release: Slackware Linux 14.0 RC4

Slackware 13.37 is released!
 It's true! Slackware 13.37 has been released. Nearly a year in the making, you will appreciate the performance and stability that can only come with careful and rigorous testing. Slackware 13.37 uses the 2.6.37.6 Linux kernel (hence our new $SLACKWARE_VERSION.$KERNEL_VERSION naming system used for this release ;-), and also ships with 2.6.38.4 kernels for those who want to run the latest (and also includes configuration files for 2.6.35.12 and 2.6.39-rc4). The long-awaited Firefox 4.0 web browser is included, the X Window System has been upgraded (and includes the open source nouveau driver for nVidia cards). The venerable Slackware installer has been improved as well, with support for installing to btrfs (for those who would like to try a new copy on write filesystem), a one-package-per-line display mode option, and alienBOB's big surprise: an easy to set up PXE install server that runs right off the DVD! More details may by found in the official announcementand in the release notes. For a complete list of included packages, see the package list.
Please consider supporting the Slackware project by picking up a copy of the Slackware 13.37 release from the Slackware Store. The discs are off to replication, but we're accepting pre-orders for the official 6 CD set and the DVD. The CD set is the 32-bit x86 release, while the DVD is a dual-sided disc with the 32-bit x86 release on one side and the 64-bit x86_64 release on the other. And, we still have T-shirts (coming soon, a limited edition 13.37 release commemorative black T-shirt with the classic Slackware logo on the front, and a "leet" LILO bootscreen on the back) and other Slackware stuff there, so have a look around. Thanks to our subscribers and supporters for keeping Slackware going all these years.

Slackware Linux

Development Release: NetBSD 6.0 RC1

 NetBSD


NetBSD is a free, fast, secure, and highly portable Unix-like Open Source operating system. It is available for a wide range of platforms, from large-scale servers and powerful desktop systems to handheld and embedded devices. Its clean design and advanced features make it excellent for use in both production and research environments, and the source code is freely available under a business-friendly license. NetBSD is developed and supported by a large and vivid international community. Many applications are readily available through pkgsrc, the NetBSD Packages Collection. » Learn more
» Latest release: NetBSD 5.1.2
NetBSD 5.1.2, the second feature update of the NetBSD 5.1 branch, was released on February 2, 2012. It represents a selected subset of fixes deemed critical for security or stability reasons. NetBSD 5.1.2 is dedicated to the memory of Yoshihiro Masuda, who passed away in May 2011. » Full 5.1.2 Release Notes
A list of download sites providing FTP, AnonCVS, and other services may be found at the NetBSD mirror sites page. We encourage users who wish to install via ISO images to download via BitTorrent by using the torrent files supplied in the ISO image area.

Distribution Release: openSUSE 12.2

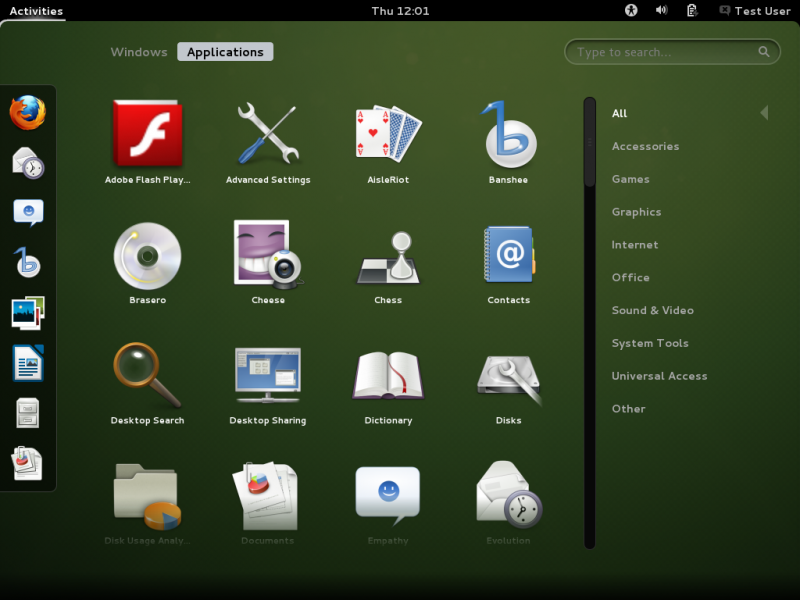
 File:OpenSUSE 12.2 GNOME overview.png


The latest release of the world’s most powerful and flexible Linux Distribution brings you speed-ups across the board with a faster storage layer in Linux 3.4 and accelerated functions in glibc and Qt, giving a more fluid and responsive desktop. The infrastructure below openSUSE has evolved, bringing in mature new technologies like GRUB2 and Plymouth and the first steps in the direction of a revised and simplified UNIX file system hierarchy. Users will also notice the added polish to existing features bringing an improved user experience all over. The novel Btrfs file system comes with improved error handling and recovery tools, GNOME 3.4, developing rapidly, brings smooth scrolling to all applications and features a reworked System Settings and Contacts manager while XFCE has an enhanced application finder.
“We are proud of this release, maintaining the usual high openSUSE quality standards.” said Andrew Wafaa from the openSUSE Board. “The delay in the schedule caused by our growth in the last two years means we have to work on scaling our processes. Now this release is out and with the upcoming openSUSE conference in October in Prague, the community has time and opportunity to work on that.”
A few of the most notable changes are in the following areas:

Preferences-system-performance.png
Performance
From the kernel to the desktop, openSUSE 12.2 brings you speed-ups: Linux 3.4 has a faster storage layer to prevent blocking during large transfers. glibc 2.15, the basic library, improves the performance of many functions especially on 64 bit systems. Systemd 44 enables faster booting. And KDE 4.8.4 builds on Qt 4.8.1 to make the desktop more responsive.

Icon-distribution.png
Evolution
openSUSE adopts the latest developments in Linux distribution technology as they mature. The GRUB2 bootloader is now the default, we’ve begun the process of revising and simplifying the UNIX filesystem hierarchy to improve compatibility across distributions, and during startup and and shutdown Plymouth 0.8.6.1 provides flicker-free transitions and attractive animations.

Icon-cleanup.png
Polish
GNOME 3.4 introduces smooth scrolling in all applications, a reworked System Settings app and polished Contacts manager. XFCE 4.10 has an improved application finder and allows vertical panels. The Dolphin file manager is both prettier and faster.

Icon-new.png
Innovation
XOrg 1.12 introduces support for multitouch input devices, and multi-seat deployments. Mozilla Firefox supports the latest Web technologies. The llvmpipe software 3D renderer enables Gnome Shell and virtual machines to use compositing even where no 3D hardware is present. GIMP 2.8 and Krita 2.4 make Free image processing and natural media painting competitive with proprietary tools. Tomahawk Player promises to make listening to music on your computer a social experience.

Icon-wiki.png
Stability
LibreOffice 3.5 continues to refine the Free office suite experience with many additions and improvements. KDE 4.8.4′s email and calendaring applications have increased stability, while the next-generation btrfs filesystem now has improved error handling and recovery tools.

Icon-yast.png
Management
The 3.4 kernel allows the capping of CPU usage across entire groups of processes. The new version of systemd offers a watchdog function for supervising services under its control, as well as a new process management tool. Sysadmins will benefit from a new suite of Digital Forensics/Incident Response tools.

Icon-feature.png
Novelty
A set of heavyweight scientific tools brings math applications such as numeric computation, plotting, and visualization to openSUSE. The Stellarium astronomical simulator lets you explore the night sky without a telescope. Programmers will enjoy version 1.0.2 of Google’s Go language, as well as the latest C++ language standards implemented in GCC 4.7.1 and Qt Creator 2.5.
Aside from these technical changes, the documentation team has made a major revision of the reference manuals, and has introduced changes to make it easier for community contributors to write openSUSE documentation.
For more details about the latest innovations in openSUSE 12.2 visit opensuse.org/12.2.

Sabtu, 01 September 2012